Hello everyone, today will share how I reorganized my craft room to fit my needs. As a side note, I would like to remind you that you don’t need a dedicated craft room and as many supplies to start crafting because for the longest time I only had a little desk in my living room corner with almost no material and I was still able to have fun crafting. Also, we transformed an old shed into my craft room just around 2 years ago. before that, there was no dedicated space just for crating. I mentioned before that I bought my crafting supplies little by little and this journey started around 7 years ago and that’s why I have so many supplies now.
Looking for Ideas
I watched way too many YouTube videos to have an idea of what I should do to make my room not only organized but also functional. My materials were mostly hidden in boxes. I loved my pink boxes, but I can’t craft with what I can’t see. I kept forgetting what materials I have, and in which box would I find them. Sometimes I would give up on a project because I would literally go through many boxes, to find one thing, then other boxes to find something else. As you can see my organization method was not working for me anymore. So, it was time to upgrade.
I Found What Works for Me
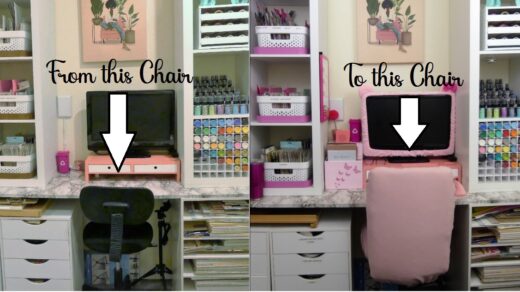
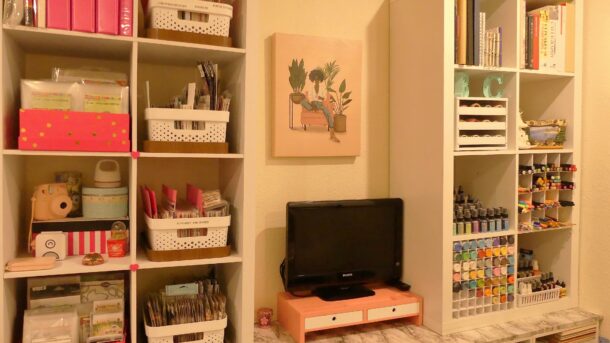
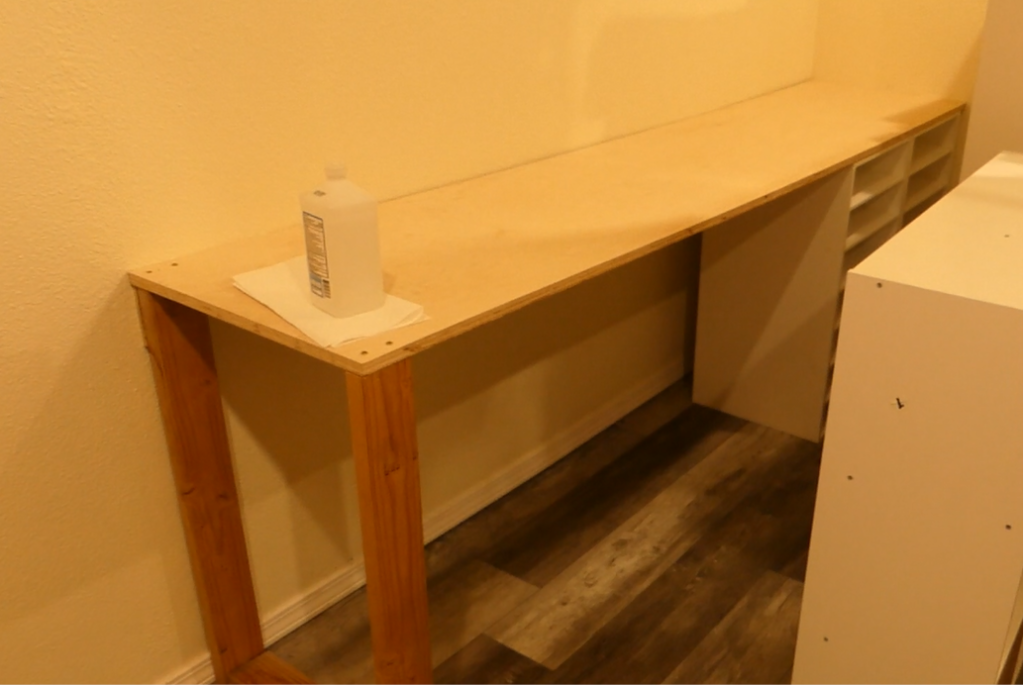
It was this video from “Love Jess Youtube channel” that got me thinking, and I loved the idea. I thought I could do something similar and not have to buy much stuff to achieve similar results. I already had 2 paper storage carts from Michaels, and I used that as the base for one side of my new “counter”. Unfortunately, they don’t make the cart at the same high anymore. I had to build two legs using wood as the support for the other side of the counter.
In the video mentioned above, Jess uses furniture from Ikea and she also found a countertop that fit her needs. I couldn’t find that, so I just went to the hardware store, bought a sheet of Smooth plywood, and ask them to cut it for me. The plywood big was enough to make the counter and have a whole other piece of the same size left if I ever need it in the future. The measurement for the “counter” is 92 x 20 inches and ¾ of an inch thick. It’s strong enough to hold the storage cubes and my supplies.
Work With What You Have
Regarding the new furniture, I don’t have an Ikea store in my area, and I didn’t need many pieces of furniture either. The little storage cart/drawers from Michaels were enough to reorganize everything that was in boxes. Just keep in mind that they are not very deep and don’t fit tall supplies like the ones from Ikea.
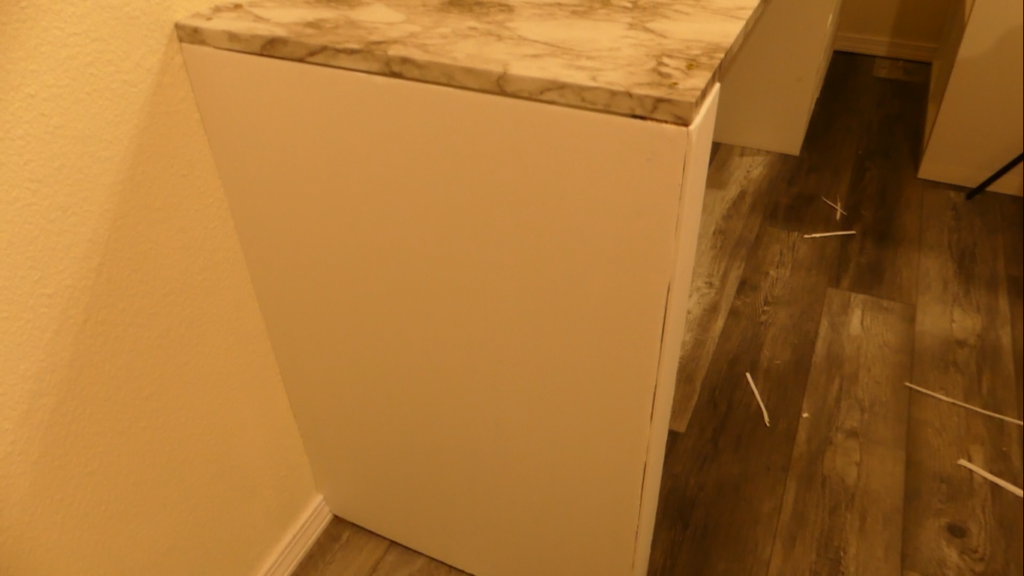
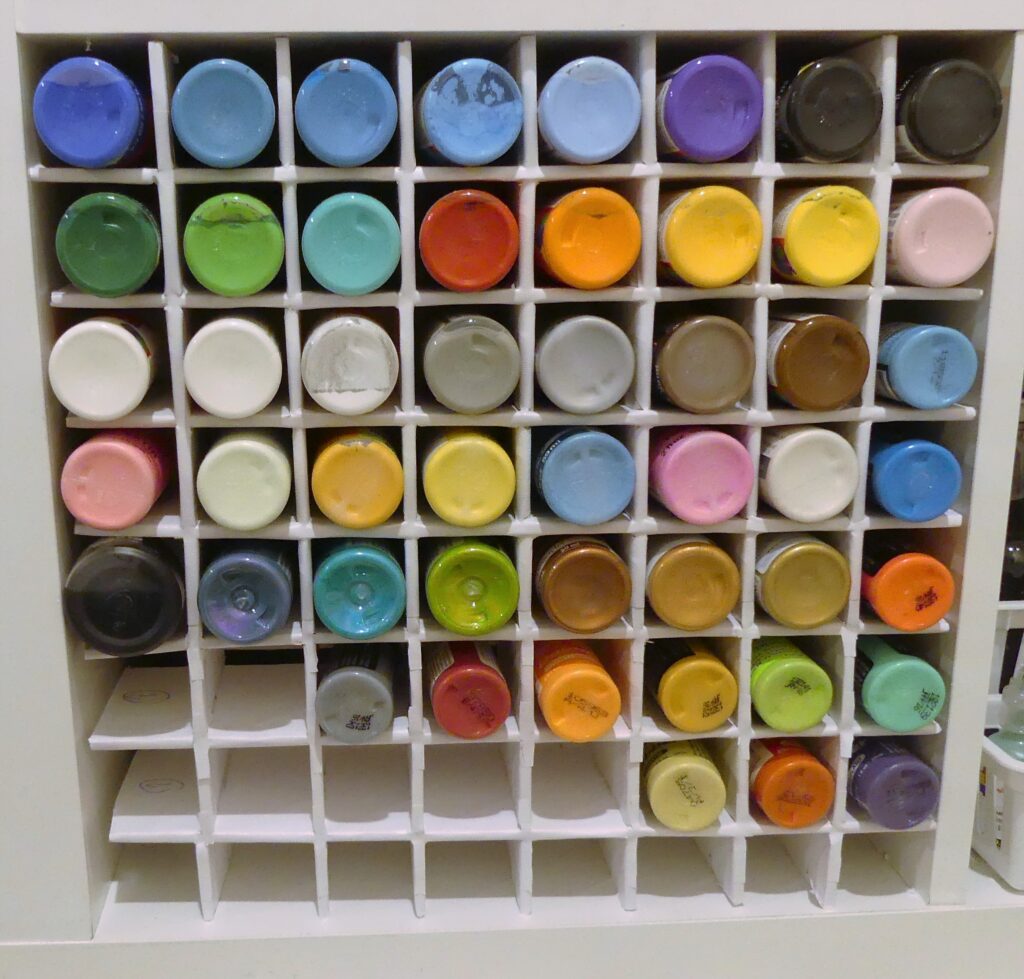
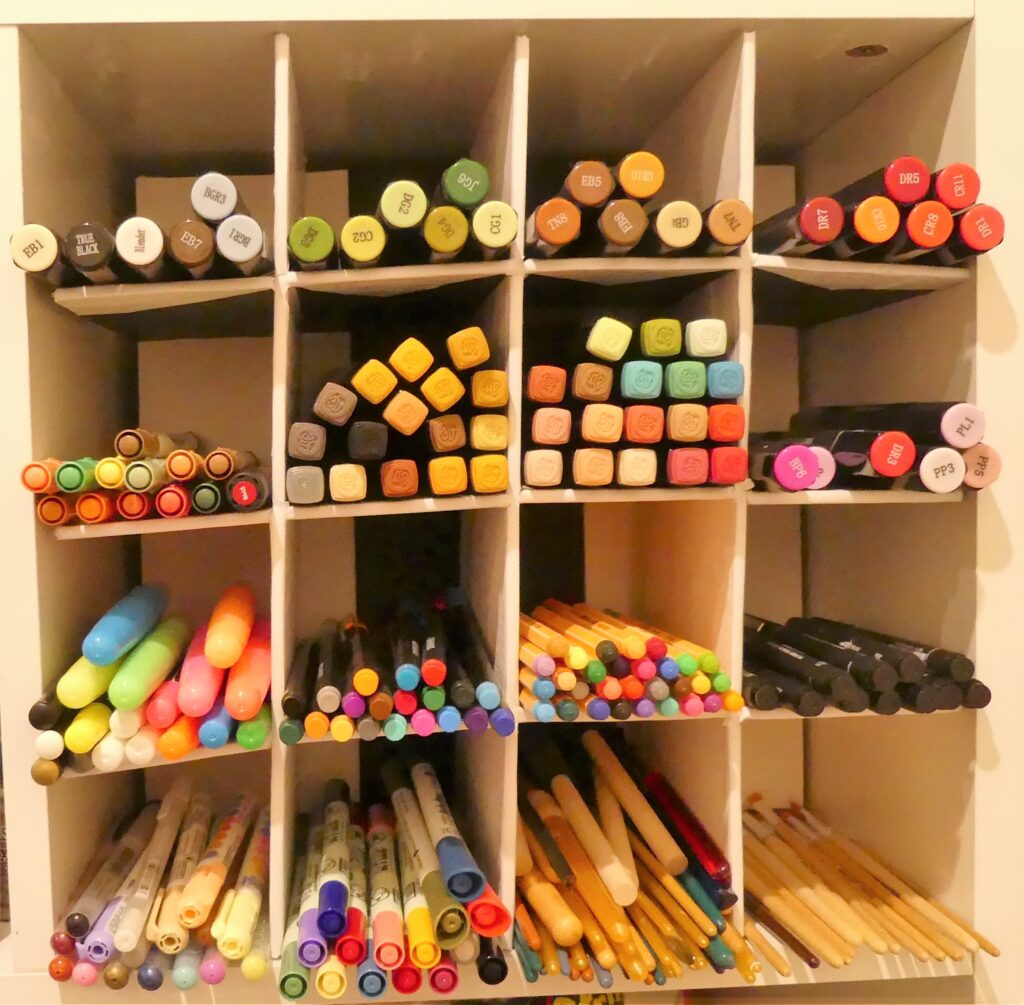
For my improvised “Countertop” I covered it with marble contact paper from Walmart. To organize my acrylic paints, I built a grid with foamboards from the dollar store. I don’t have a huge amount of paints, so that was enough to hold them all. I used the same process to build another grid for my alcohol markers, pens, and brushes.
To see the speeded-up process of my room transformation, please take a look at the video below.