Hello Everyone,
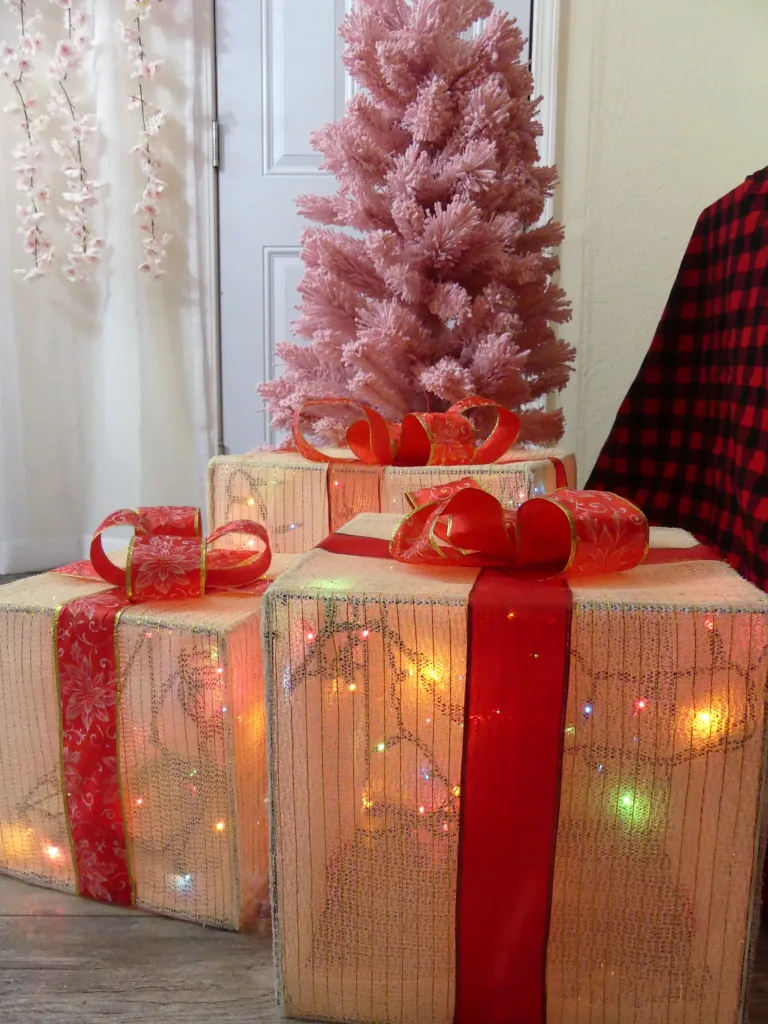
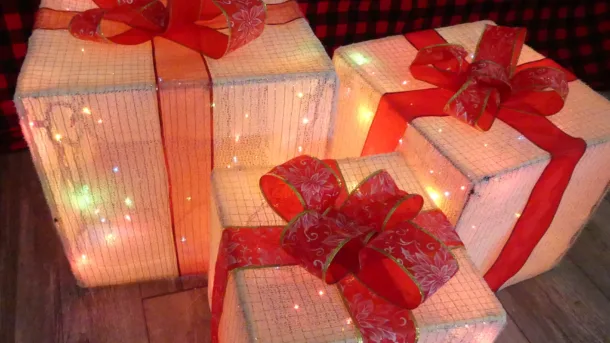
Today I’ll show you how I made these three decorative Christmas boxes using Dollar Tree materials. For this project, you will need 5 wreath frames, 6 if you want to reinforce the bottom. Shelf liner, or grip liner, small cable ties, decorative mesh, decorative ribbons, hot glue gun and glue sticks, lights if you want it to light up, and any other decorations you want to add. You will also need binder clips or any other tools you have to keep the box liner in place. To cut the wreath you will need a wire cutter and a pair of pliers to remove the cut bits.
I started separating the frames, but you can use a full one, however, I wanted to keep the project as affordable as possible. Separating the frames is not hard, just time-consuming. Also please wear gloves and be careful with your eyes.
Assembling
I’ll start assembling the smaller box. I used cable ties to tight them all together. I added the 5th one at the top to make the box more sturdy and less wobbly. Use as many cable ties as you find necessary. After the box is secured, I cut the excess cable ties and started to cover the box with the shelf liner. Just add hot glue to the frame and place the liner on top. To secure it in place I used binder clips. But the glue dries pretty fast.
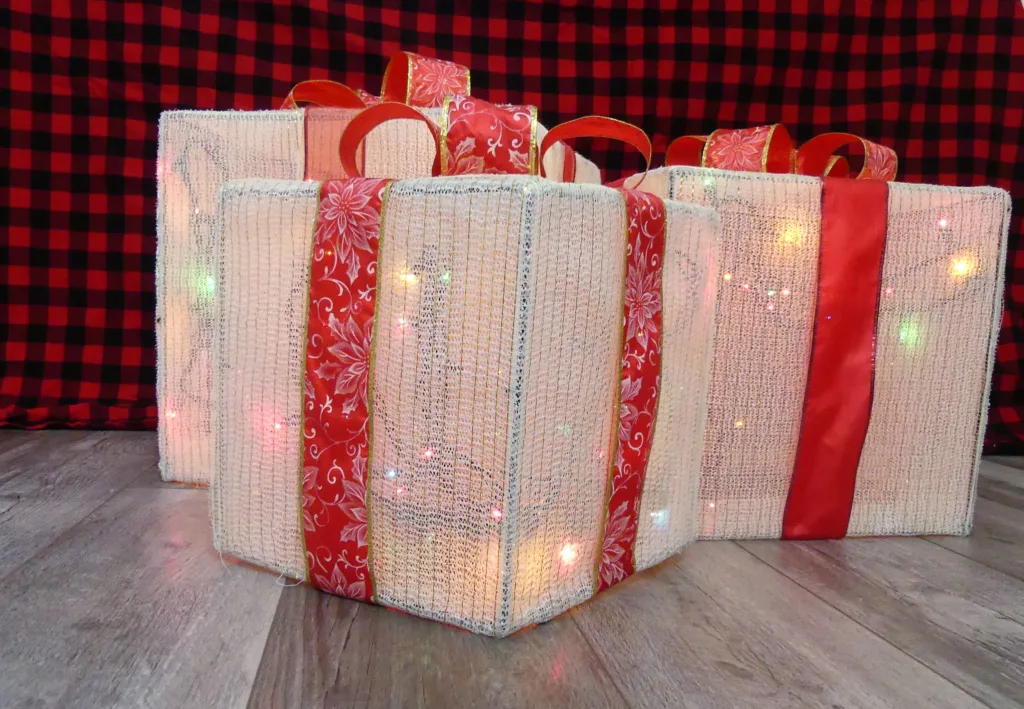
For the small decorative Christmas box, the shelf liner covers the whole thing, however for the medium and bigger boxes, you will need more than one each. The same goes for the decorative mesh.
Before I cover all sides of the box, I’ll try to clean the corners. I gave it a snip at the top of each corner and secured it with hot glue and cut the excess liner. Repeat that step on all sides.
You can stop with the liners and just add the ribbons and lights. However I thought it was a little too plain, so I decided to add gold and off-white decorative mesh.
The mesh I have is not wide enough to cover the whole box at once, so I had to add it twice, once on each side, and have it meet in the middle.
For the medium and bigger box, that was a bit trickier, since you can’t cut the mesh on the sides. Just overlap it when necessary. Also, if you have any other materials like fabric that you want to cover the box with, just go for them. Hot glue pretty much sticks with any soft material. This project’s easy to make. Timing consuming, but not hard.
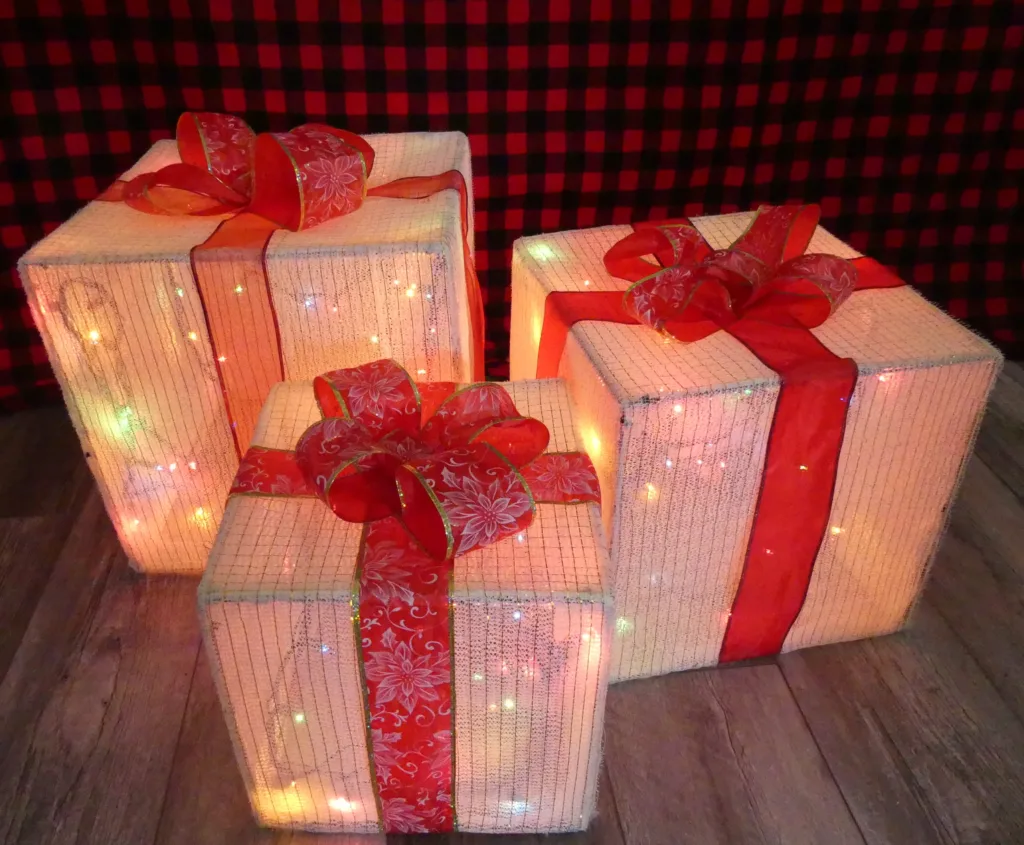
Once the box is done, I’ll just add the ribbon, glue it with hot glue and secure it with the binder clip.
You can make the bow however you want. I struggled to make bows, so I did whatever was easier for me. Since I miscalculated how many ribbons I would need, I had to improvise. If you want to do the same bow, just cut 2 pieces of ribbon in different sizes, and glued the ends together to make loops. I added a tiny leftover piece to the middle. Just fluffy it up and that’s it.
Adding the lights
To hang the lights, I used the little hook to hang ornaments on the Christmas tree. Please make sure the lights you use do not get hot. These materials can melt and cause an accident.
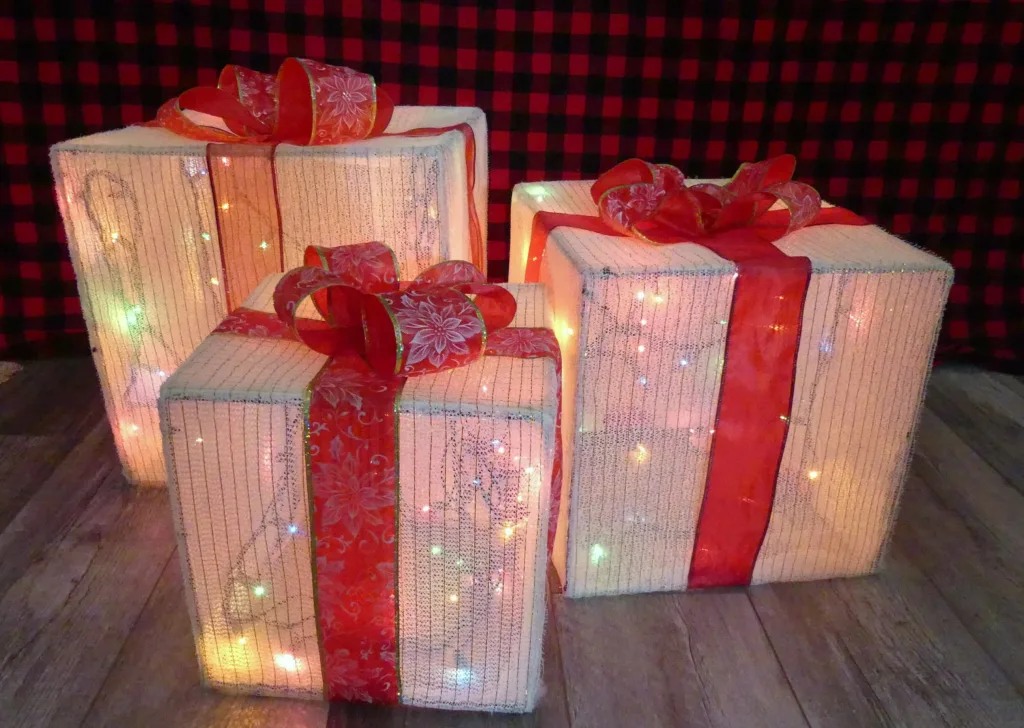
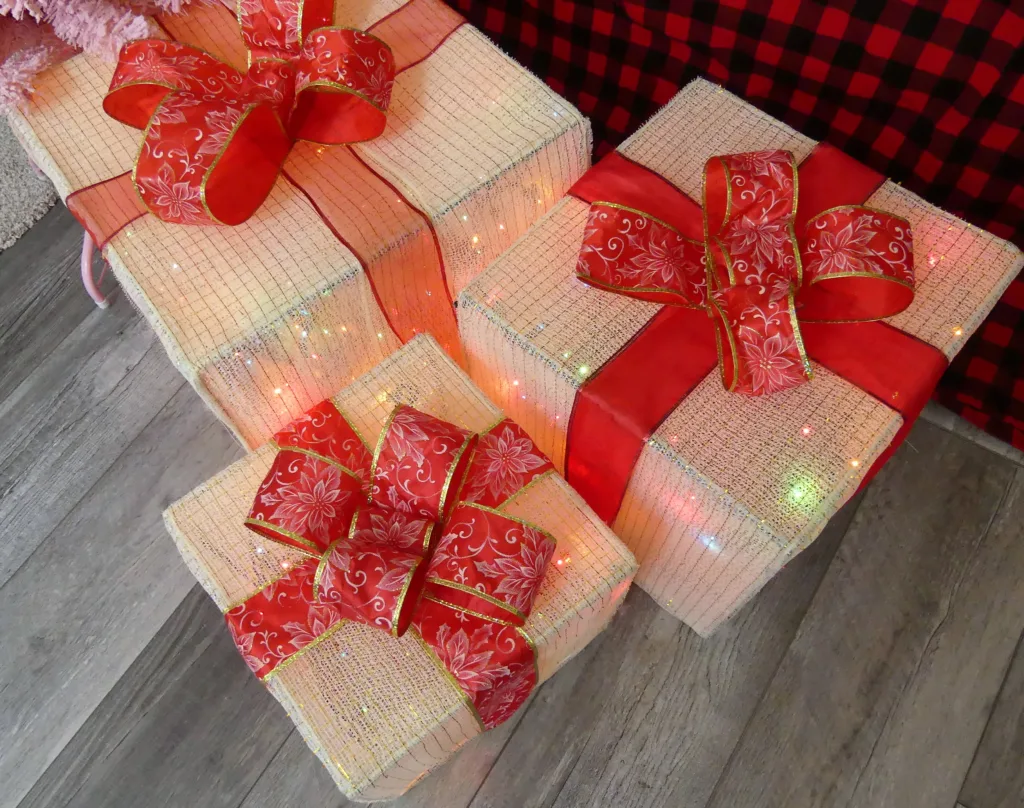
Just repeat the same process for the other two boxes and you will have beautiful decorative Christmas boxes to decorate your house.
You can also check other DIY posts here. You can subscribe to my YouTube Channel here
Merry Christmas, and happy holidays!
Decorative Christmas Box Pictures