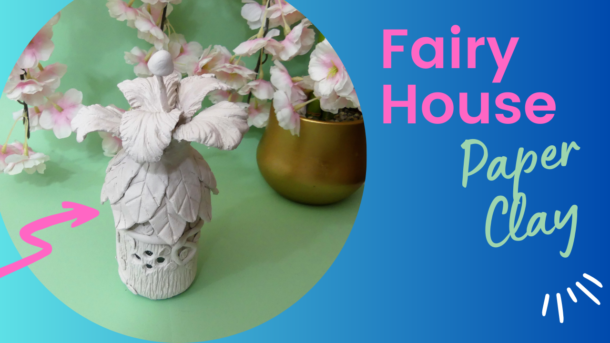
Hello Everyone, I will show you how to make this lily fairy house with paper clay.
Besides the clay, all the other materials, you might already have at home. for this little house, I used a small recycled jar, aluminum foil, DAS paper clay, a small amount of Elmer’s glue, water, hot glue, and some improvised sculpting tools.
Covering the Jar and Lid With Clay
To make the shape of the lid higher and have a base to make the flower later on, I added some aluminum foil squished into a half ball and glued it down with hot glue. The reason for using aluminum foil is to save the clay. You can also replace the foil with newspaper.
I kneaded the clay and opened it with a rolling pin. added the clay over the lid, trying to shape and smooth it out. it’s easy to make this clay smooth by spraying water. However, I do not know if it’s my lack of experience, or if this clay it’s just a bit too hard to add fine details to the project. After shaping the lid, I moved on to the glass jar. I covered it again with the clay, and smoothed it out as much as possible, which was a silly move.
Soon I realized that this should resemble a treebark so I would go ahead and use a paper clip to add texture. I used a straw to carve holes and my craft knife to add some windows and details to this mini lily fairy house.
As soon as the clay dried, I added vines and tiny leaves, that I cut with a straw and used a paper clip to add details. For the lid, I added more leaves, which I improvised with a cookie or sugar cutter that I bought online. That cutter set came with a silicone mold, which I used to shape the lily petals.
Lily Fairy House YouTube Video
Click here to see homemade Air Dry Clay.